Approvals
|
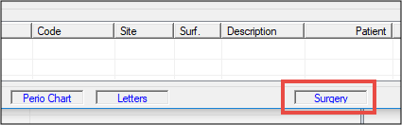
This section explores how to work with patient approvals. Your institution may choose to use a request-based workflow to complete patient approvals. If enabled, student providers must request approval for items when they finish them during an appointment, then prompt faculty members to approve the items. It makes use of an Approval Request window, the Review Billing Information window, clinical notification states, and if configured, a controllable intervention event. A request-based workflow places responsibility on the student provider to identify which parts of their work are ready for approval, to ensure they pass the required checks, and to correct all deficiencies prior to engaging faculty for approval. It pushes students to request approval for work done for the patient associated with the current appointment, maintaining the focus on the appointment currently in session. Important: A student provider can only make requests if they are set to use approval requests. When a student provider is ready to have work that was done during an appointment approved by a faculty member, they can use a specific clinical notification state to display the Approval Request window and request approval for the item(s). Important: Clinical notification states are only accessible within an appointment’s timeframe. This is set through a station option and defined as the period that starts x minutes before an appointment and ends y minutes after an appointment. The approval request workflow may vary depending whether you want to request approval for one or multiple items. With the changes to the warning/error checking timing, a variety of warnings/errors may display during the approval request process. Note: Some warning/errors only apply to certain item types. Examples: “Treatment was not start checked” can only display for treatments. To request approval for items:
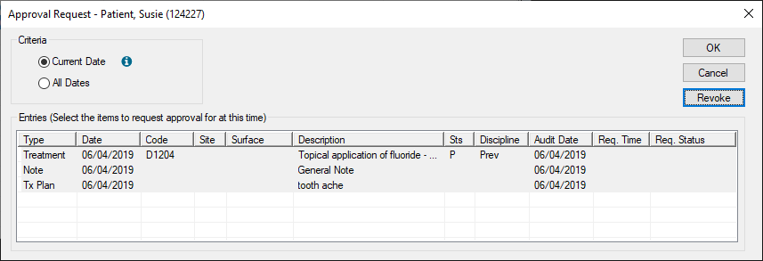
Example: Need Approval. Important: The selected chair and current date and time determine which patient name displays in the Approval Request window. For student providers that have appointments in multiple chairs, each chair displays the associated patient name at the top of the clinical notification states list. If you want to display the window for the other patient, select the other chair before you select the clinical notification state. Note: If you have another patient selected in axiUm, the selected patient changes to the appointment patient when you open the Approval Request window.
The Approval Request window displays and lists unapproved items for the current provider, date, and appointment patient by default. Note: All record types display listed in chronological order as they were added or modified.
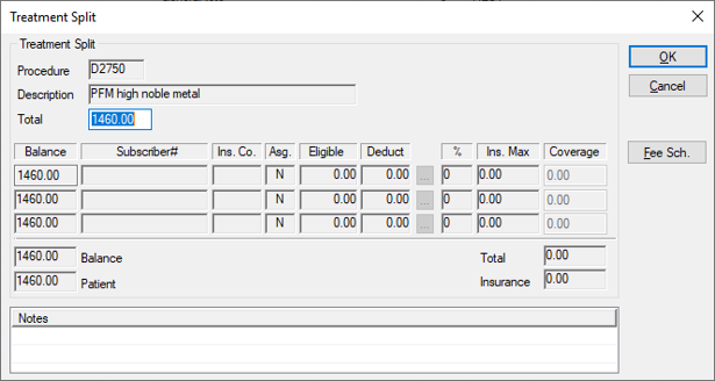
Note: Only unapproved items entered by or for the current user and patient display. This includes items that are pending approval. If applicable, any incomplete or missing work errors/warnings display. Examples: Missing patient consents, treatment forms, or start checks. Note: If an error displays, you cannot continue. If a warning displays, your institution’s workflow determines whether you continue the request or stop to finish the work. If stopping, you can request approval after the missing/incomplete work is finished. If no errors and/warnings display, or you choose to continue past the applicable warnings, the approval request process continues. If you selected any P/I/C treatments, the Review Billing Information window displays with the Clinic, Practice, Facility, Policies, and Billing ID fields defaulted. Note: If edited or deleted treatments are selected, the window does not display.
Important: The fields in this window are read-only. Review carefully for issues and alert the appropriate staff member or alert faculty during approval if necessary. Important: If you click Cancel, a warning displays, cautioning you that the approval request will be cancelled for all items you have selected. You can click Yes to cancel the request or click No to continue with the request. If the approval request is sent successfully, the Approval Request window closes. The student may now contact a faculty member to approve the items or, if your institution uses the Operatory Monitor, faculty members can review it for new requests. Each item a student provider requests approval for displays as a line in the Patient Approvals window when the Requested Items radio button is selected. If a request was made too early or an item requires editing, the student provider can retract the approval request for the item. If retracted, the item no longer displays in the Patient Approvals window when the Requested Items radio button is selected and it re-displays as black in the Approval Request window. Note: If the faculty member selects the All unapproved Items radio button, the retracted item still displays in the Patient Approvals window. After a student provider retracts an approval request, they can make any necessary changes and request approval for the item again when ready. To retract a requested item:
Any requested items display in grey, a Pending status displays under the Req. Status column, and the time you requested approval displays under the Req. Time column.
The item(s) re-display in black and the Req. Status and Req. Status columns re-display as blank. Once a requested item has been retracted, the student provider can update or correct the record(s) and request approval for the item again. When a provider is configured to require approval, a faculty member must approve all applicable items done on a patient’s record. If a patient’s chart number displays in teal on the status bar, this indicates that an item on their record requires approval. Tip: If the provider uses approval requests, we recommend you wait until they request approval and notify you before attempting to review and approve the item(s). When completing approvals, a variety of warnings/errors may display when applicable. Note: Some warning/errors only apply to certain item types. Examples: “Cannot approve treatments for multiple providers” or “Treatment was not start checked” can display only for treatments. If you review an item that you do not want to approve because it requires more work, you can leave the item unapproved. It remains in the Patient Approvals window because it has not been approved, and the student provider should make the necessary edits to the item so you may approve it. Tip: If the student provider must make extensive changes to the item and they use approval requests, they can retract the requested item, finish the necessary work, and request approval again.
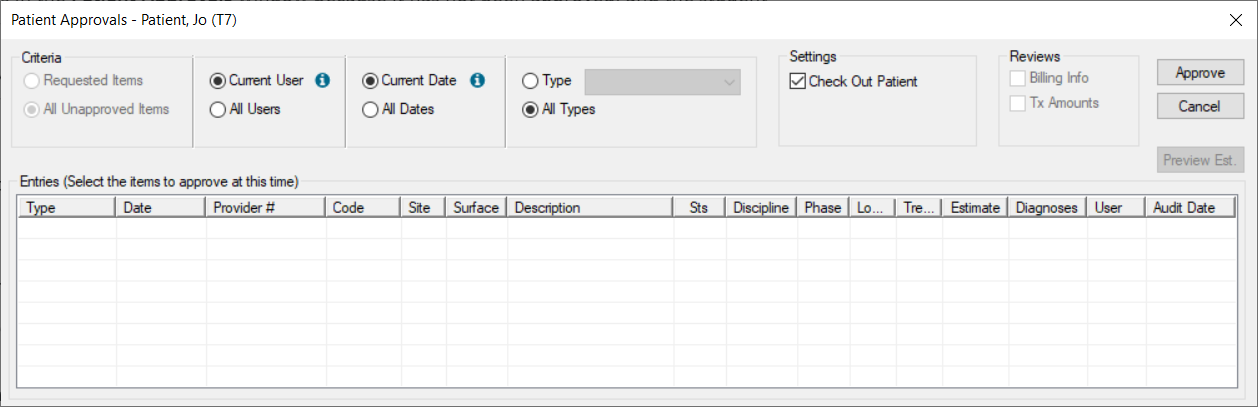
Important: The Criteria filters default differently depending how the student provider is configured and you may need to modify the filters. For student providers that use approval requests, the Requested Items and All Unapproved Items radio buttons are enabled.
Important: The filters can have different default behavior depending on how the student provider is set up for approval requests.
Tip: Press Ctrl to select multiple records. Note: The Status column indicates an item’s status and whether an item has been edited or deleted. Example: A treatment can have a P/I/C status and may also display a (D) if it was deleted or an (E) if it was edited.
Note: This checkbox only displays if configured from Maintenance > System > Station Options > Patients > Patient Approvals > PtApprovalCalcTotals. axiUm performs a security check and, depending which location you are approving from, one of the following occurs: Note: When approving from either workstation, if you do not have authorization for all item type(s) selected, an Approval Access Warning window displays. If prompted, click Yes to continue with the approvals you are authorized to approve or click No to close the window and stop the approvals process for all items.
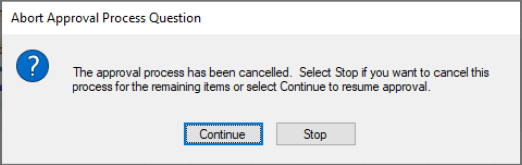
After you authenticate successfully, the approval process for the selected item(s) begins and occurs in the order the items are displayed in the Patient Approvals window. As each record type is approved, the appropriate checks are performed and any error/warning messages for that item type display. If no error/warning messages display, one of the following occurs for each selected item: Note: If you cancel approval for an item, it remains in the Patient Approvals window. Important: If you cancel the approval process and there are remaining selected items that are unapproved, a message displays, asking you to confirm whether approval process should be stopped completely or should carry on with remaining items.
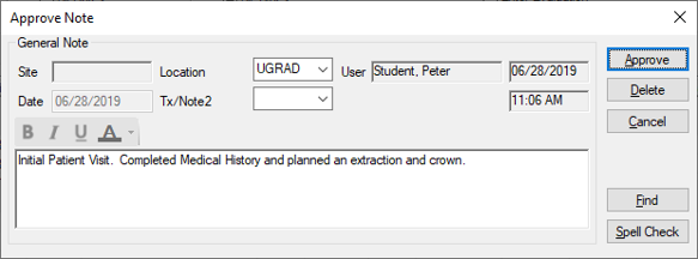
For more information about the details of approving each item type, see the relevant section below. When approving a note record type, the Approve Note window displays.
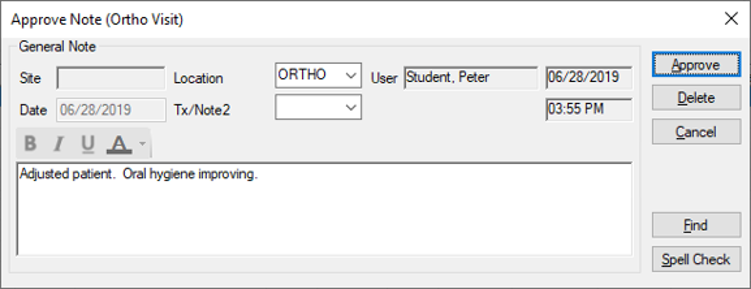
Note: If the note you are approving is a deleted note, the Delete button is disabled. Note: If you click Cancel and other items are selected for approval, the Abort Approval Process Question window displays. Click Continue or Stop as necessary. When approving an ortho visit record type, the Approve Note (Ortho Visit) window displays.
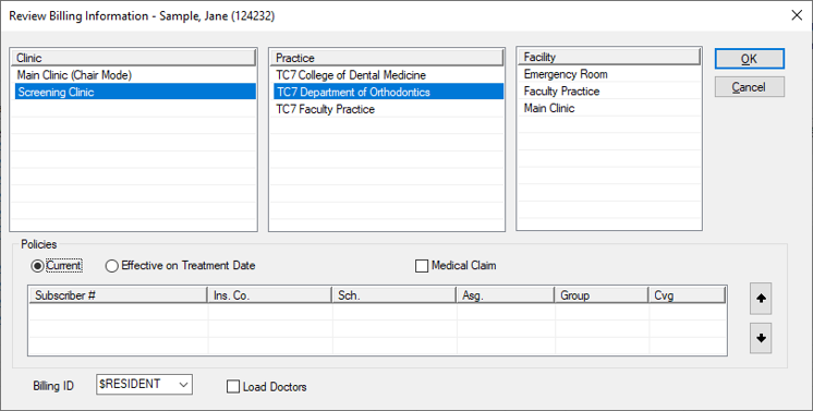
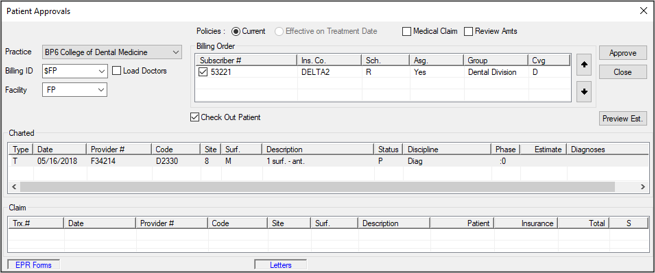
Note: If the ortho visit note you are approving is a deleted note, the Delete button is disabled. Note: If you click Cancel and other items are selected for approval, the Abort Approval Process Question window displays. Click Continue or Stop as necessary. When approving a P/I/C treatment record, and the Billing Info checkbox is selected, the Review Billing Info window displays. Note: If you are approving an in-progress or completed treatment that has an (E) or (D) status, the Billing Info checkbox is disabled so the Review Billing Information window cannot display.
Note: The Review Billing Information window only displays once, even if multiple treatments are selected. Important: The fields below are not intended to be modified unless absolutely necessary. For most situations, we do not recommend modifying the fields.
Note: If you click Cancel and other items are selected for approval, the Abort Approval Process Question window displays. Click Continue or Stop as necessary.
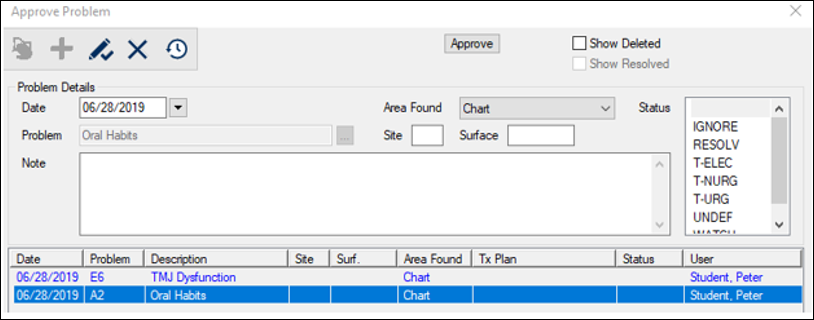
Note: If you click Cancel and other items are selected for approval, the Abort Approval Process Question window displays. Click Continue or Stop as necessary. When approving a finding record type, nothing displays. Findings are approved as they are reached in the list and cannot be cancelled once you select them and click Approve. Note: Findings are not grouped together in the list. They are listed in chronological order according to when they were done. When approving a problem record type, the Approve Problem window displays. Note: If multiple problems require approval, the currently selected problem displays. The Approve Problem window re-displays when the next selected problem is reached in list of approval items.
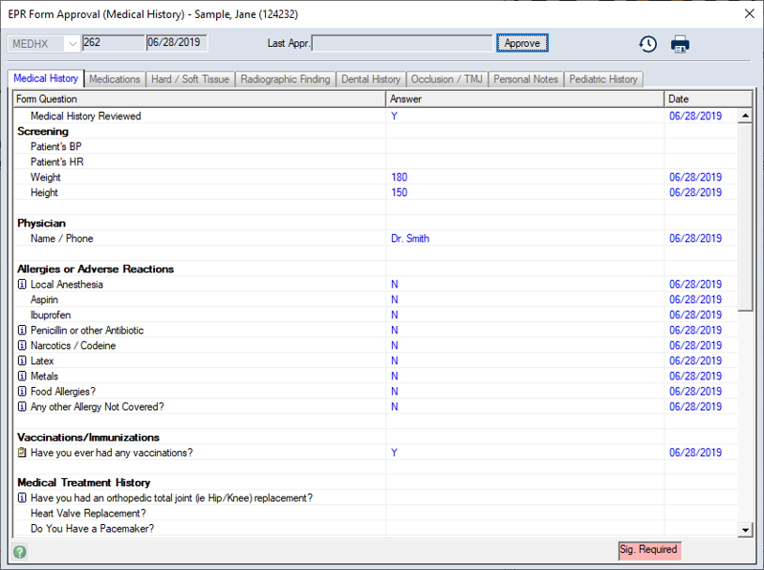
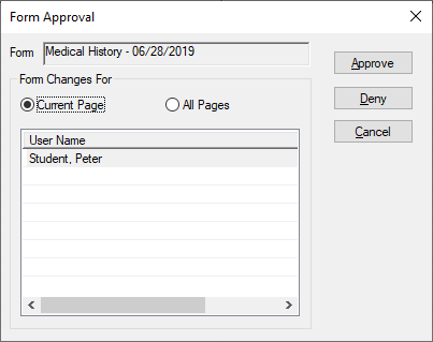
Note: Only the highlighted entry will be approved. The other entries cannot be selected and will be approved when reached in list of approval items. Note: If you do not click the Modify Record ( Note: If you click X or the Delete ( When approving a form record type, the EPR Form Approval window displays.
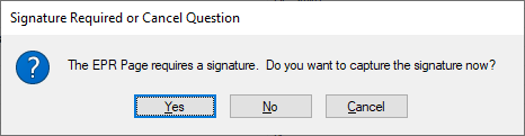
If a signature is required, but has not yet been obtained, a prompt to enter a signature displays.
Note: If you click Cancel and other items are selected for approval, the Abort Approval Process Question window displays. Click Continue or Stop as necessary.
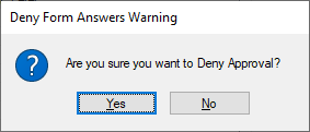
Important: If all changes are denied and the form was previously approved, it reverts to those answers. If all changes are denied and the form has no previous versions, the form is deleted. If answers to specific questions created other records, such as Alerts, the related prompts display. Click Yes or No as necessary.
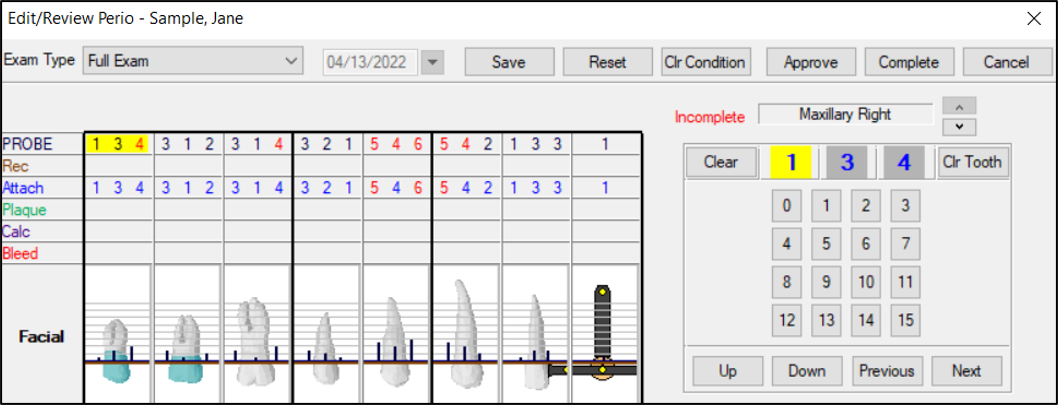
When approving a perio exam record type, the Edit/Review Perio window displays. Note: If the exam is incomplete, the Complete button is enabled.
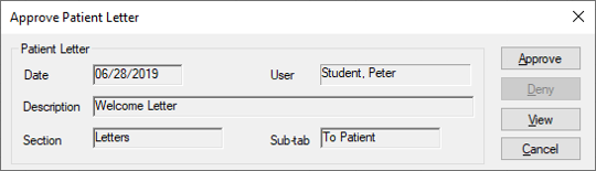
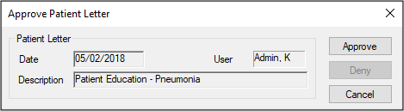
Tip: An Incomplete label displays in red if the perio exam has not yet been completed. Note: If the logged in user (e.g., faculty member) is not the provider that performed the exam, a Complete Perio Exam message displays. If prompted, click Yes to confirm the completion. Note: If you click Cancel and other items are selected for approval, the Abort Approval Process Question window displays. Click Continue or Stop as necessary. When approving a letter record type, the Approve Patient Letter window displays.
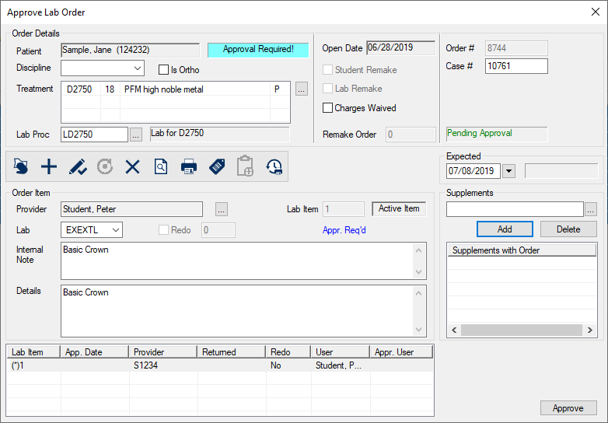
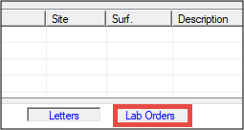
Note: If you click Cancel and other items are selected for approval, the Abort Approval Process Question window displays. Click Continue or Stop as necessary. Note: If approving the letter for the first time, Deny is not enabled. When approving a lab order record type, the Approve Lab Order window displays.
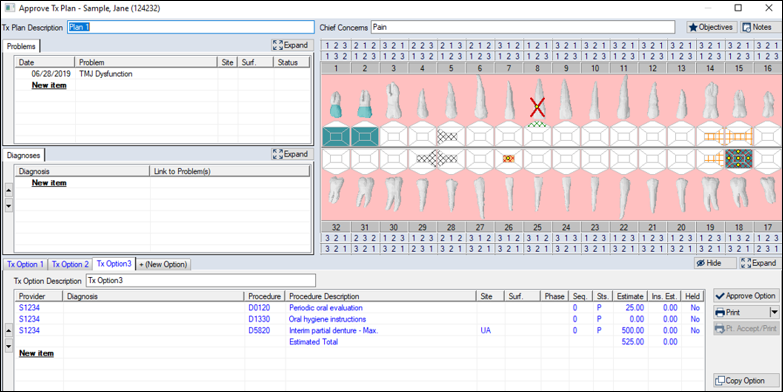
Note: If you click Cancel and other items are selected for approval, the Abort Approval Process Question window displays. Click Continue or Stop as necessary. When approving a treatment plan record type, the Approve Tx Plan window displays.
Note: If you click Cancel and other items are selected for approval, the Abort Approval Process Question window displays. Click Continue or Stop as necessary.
The Patient Approvals window displays the item(s) that require approval.
Note: Procedures are marked with a P, I, or C Status. Note: Conditions are marked with an A or E Status. Note: Notes are marked with an D Status.
Once all items are approved, the chart number returns to gray. |